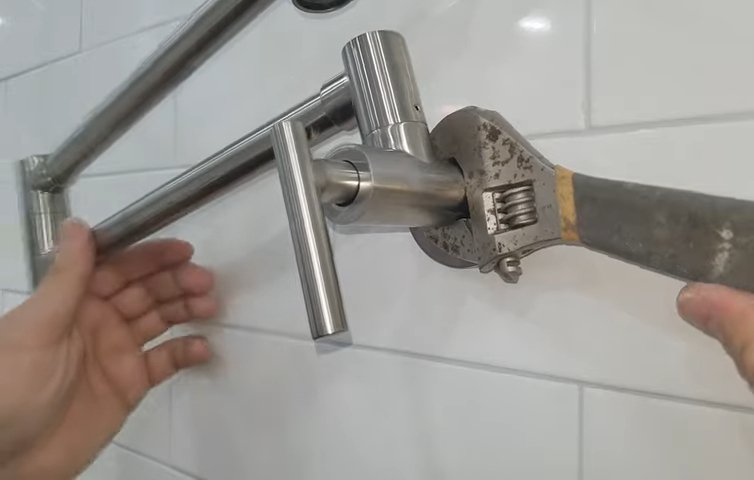
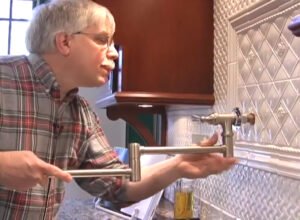
Pot fillers have emerged as popular kitchen fixtures, offering significant convenience by allowing cooks to fill large pots directly at the cooktop. Proper pot filler installation height plays a crucial role in ensuring both functionality and aesthetics. An installation that is too low can impede the range of motion of large pots, while one that is excessively high may complicate handling or detract from kitchen design. Drawing on manufacturer guidelines, plumbing-code considerations and expert commentary, this analysis examines the optimal parameters for pot filler placement, with a focus on installation height, location and related rough-in measurements.
Defining Pot Filler Height Parameters
Spout Height Above Cooktop

The central dimension in any pot filler layout is the spout height above the cooking surface. Manufacturer and design resources converge on a typical range:
-
16 to 22 inches above the stovetop: Kingston Brass advises that “the faucet spout needs to be placed anywhere from 16 to 22 inches above the surface of the range top or stove.” (kingstonbrass.com)
-
16 to 18 inches as a standard: A detailed guide notes that “the standard height for a pot filler is typically 16 to 18 inches above the stovetop. This height allows for easy access and accommodates most pot sizes without any issues.” (bo-ha.com)(bo-ha.com)
-
Maximum of 18 inches recommendation: The Galley installation guide specifies, “We recommend a height of no more than 18”.” (thegalley.com)
These recommendations account for a variety of pot dimensions. A practical tip is to “grab the biggest stockpot used on the stove and add at least three or four inches to its height. That will ensure that the faucet clears the top of all pots and pans used in the kitchen with ease.” (kingstonbrass.com)
Variations Based on Stove Height
Stove heights themselves vary—standard ranges stand between 36 and 36.5 inches from floor to cooktop surface. To determine pot filler height from floor, installers often combine stove height with desired clearance:
-
Measure stove height (e.g., 36 inches).
-
Add spout clearance (e.g., 18 inches).
-
Resulting pot filler mounting height: approximately 54 inches above the floor.
In practice, installers report rough-in heights between 50 and 60 inches from the floor, adjusting for user reach and cooktop model. One installer noted, “We rough our pot fillers in between 50”–60” depending on stove height.” (reddit.com)
Pot Filler Rough-In Height and Plumbing Considerations
Inlet Rough-In Distance
Pot filler rough-in height refers to the vertical distance of the plumbing inlet stub-out before fixture installation. Key rough-in guidelines include:
-
Minimum 13 inches from cooking surface: The Galley guide states that the “rough-in should be installed at minimum 13” from the cooking surface.” (thegalley.com)
-
Max reach of 24 inches: A 24-inch spout reach accommodates most configurations, ensuring the pot filler can extend over all burners. (thegalley.com)
Local Code Compliance
No universal plumbing code prescribes a fixed pot filler height. InterNACHI’s forum clarifies: “There is no actual ‘standard’ for wall-mounted ‘pot filler faucets’ installation height. Most manufacturers just make a cursory statement to install above the tallest intended pot height.” (forum.nachi.org) Installers must comply with local building and plumbing codes, which typically address materials, shut-off valves and backflow prevention rather than fixture height.
Strategic Pot Filler Placement
Centered vs. Offset Positioning
Deciding on pot filler centered or offset relative to burners hinges on cooktop configuration and user ergonomics:
-
Centered placement: Positions the spout directly over the largest burner, facilitating symmetrical access.
-
Offset placement: Shifts the filler to one side (often 3.5–4 inches off-center) to align with existing plumbing or to clear decorative elements. For instance, Newport Brass specifies a “3.51” (8.9 cm) pivoting inlet valve offset (wall-center).” (newportbrass.com)
Horizontal Rough-In Distance
Horizontal spacing—measured from the wall inlet valve to cooktop edge—commonly ranges from 0 to 4 inches, depending on the pot filler’s design and the wall’s composition (thin tile backslashes may require more offset). Newport’s specification of “21.19” (53.8 cm) pivoting spout reach from inlet valve (c-c)” accommodates this variability. (newportbrass.com)
Impact of Cabinetry and Backsplash
Design elements such as cabinetry depth and backsplash materials influence pot filler placement:
-
Cabinet Overhang Clearance: If wall cabinets hang directly above the cooktop, maintain at least 3 inches of vertical clearance between filler and bottom of cabinet crown moulding.
-
Tile or Stone Backsplash: Solid backsplashes support the weight of the pot filler. Veneer or thin tile may require reinforced backing at rough-in stage.
Expert Insights and Historical Context
User-Driven Variability
In professional forums, plumbers and remodelers emphasize user preference and pot size variability. A Houzz discussion notes: “A typical height dimension is 12” to 18” from the cooking surface. However, always refer to local code.” (houzz.com) Another user concurs, “I think 14–16” works just fine. You don’t want to be too low with the pot filler and not be able to fill a huge pot.” (houzz.com) These perspectives underscore that pot filler height and location must balance standard guidelines with individual needs.
Evolution of Pot Filler Use
Pot fillers date to early 20th-century kitchens in professional restaurants, where convenience and workload reduction were paramount. As residential kitchens adopted professional-grade features, pot fillers became symbols of modern design and efficiency. Their contemporary adoption reflects a broader trend toward specialty faucets that streamline tasks and reduce manual handling.
Installation Process Overview
-
Site Preparation
-
Confirm electrical outlets and gas lines are clear.
-
Reinforce wall studs if necessary for heavy-duty fixtures.
-
-
Rough-In Plumbing
-
Install ½-inch supply line with shut-off valve at the calculated rough-in height (e.g., 13 inches above cooktop).
-
Ensure inlet valve center aligns horizontally with desired spout offset.
-
-
Mounting and Securing
-
Attach mounting bracket to wall anchors or reinforced backing.
-
Connect pot filler valve body to supply line using Teflon tape per manufacturer instructions.
-
-
Adjustment and Testing
-
Adjust arm pivot torque to allow smooth extension and retraction over range.
-
Pressure-test supply for leaks before finishing wall.
-
-
Finishing and Sealing
-
Install escutcheon plate to cover inlet.
-
Seal around escutcheon with food-grade silicone for moisture resistance.
-
Cost Considerations and Value Proposition
Installation costs vary widely based on existing plumbing and structural modifications:
-
Low-end installations (pre-plumbed walls): approximately $280.
-
High-end remodels (new plumbing access, wall reinforcement, tile repair): over $3,500. (thespruce.com)
Despite the investment, potential advantages include:
-
Enhanced workflow efficiency for frequent chefs.
-
Aesthetic upgrade that may enhance resale appeal.
Maintenance and Longevity
Routine maintenance ensures safe, leak-free operation:
-
Regular Inspection: Check pivot joints and valve seals for drips every 6 months.
-
Cleaning: Wipe spout and arms to remove grease and food splatter. A mild detergent prevents finish degradation.
-
Valve Servicing: Ceramic disc cartridges typically last over 500,000 cycles; replace as needed.
Frequently Asked Questions
-
How high should a pot filler be above the stove?
Manufacturers generally advise 16–22 inches above the cooktop surface (insideast.com); many installers prefer 16–18 inches for standard stockpots. (bo-ha.com) -
What is pot filler rough-in height?
Rough-in inlet height is typically a minimum 13 inches above the cooking surface, allowing for a recommended maximum spout height of 18 inches. (thegalley.com) -
Should a pot filler be centered or offset?
Centering simplifies access over the main burner; an offset of up to 4 inches may align better with wall studs or backsplash patterns. (newportbrass.com) -
Can pot filler height vary by pot size?
Yes. For exceptionally tall stockpots, installers may increase spout clearance, provided it remains within ergonomic reach. -
Is there a code requirement for pot filler height?
No strict code mandates height; compliance focuses on materials, shut-off valves and backflow prevention. Installers should reference local plumbing regulations. (forum.nachi.org)
By integrating manufacturer recommendations, plumbing-code parameters and expert installer insights, homeowners can determine the pot filler installation height that aligns with both design objectives and functional requirements. Careful measurement, strategic placement and attention to rough-in details ensure that the fixture enhances kitchen workflows, safety and aesthetics.


