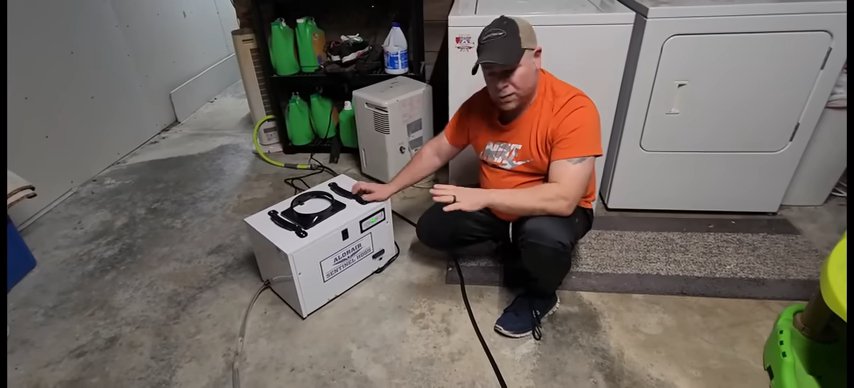
Maintaining controlled humidity in commercial environments can prevent structural damage, safeguard sensitive equipment and products, and promote occupant comfort. This guide offers data-driven analysis and procedural clarity for professionals tasked with deploying commercial dehumidification systems. Citations accompany technical statements to ensure precision and traceability.
Overview of Commercial Dehumidification

A dehumidifier “is an air conditioning device which reduces and maintains the level of humidity in the air” (Wikipedia). Commercial applications span warehousing, manufacturing, storage of pharmaceuticals and electronics, indoor ice rinks and swimming pools.
Key considerations include:
- Industrial humidity requirements: Relative humidity (RH) for occupied spaces is typically specified at = 65 % (ashrae.org). Specialized applications may require tighter RH bands (e.g. 30–60 % for pharmaceuticals (ISPE)).
- Ambient temperature considerations: Refrigerant units perform best above 20 °C, while desiccant models sustain performance down to subzero levels (Humiscope).
- Application-specific dehumidifiers: Options include portable commercial units, fixed installation dehumidifiers and whole-building systems.
Dehumidifier Types and Operating Principles
Desiccant vs Refrigerant Dehumidifiers
- Refrigerant dehumidifiers operate by drawing warm, moist air over cooled coils, causing condensation. Performance declines below approximately 15 °C (climatedry.co.uk).
- Desiccant dehumidifiers use hygroscopic wheels or materials (often silica gel) to adsorb moisture. They regenerate via heated air, remain effective at low dew points and can reduce RH to 5 % (Wikipedia).
“Desiccant dehumidifiers require no moving-parts maintenance under normal circumstances” (Ionmax). Energy consumption for desiccant models typically exceeds that of refrigerant units in warm climates, though the heat output can offset space heating demands (Ionmax).
Industrial Dehumidifier Types
- Low-temperature dehumidification: Desiccant-based or low-grain refrigerant (LGR) units rated for operations as low as 10 °F (-12 °C) (Wikipedia).
- High-capacity moisture extractors: Centrifugal or industrial-scale compressor systems that yield multiple hundred liters per day.
- Specialized dehumidifiers: Explosion-proof units for hazardous locations; membrane-based designs that expel water vapor rather than liquid.
Sizing and Selection Criteria
Determining Moisture Load
Calculate the total moisture load by summing internal sources (process emissions, infiltration, occupant respiration) and external loads (outside air ventilation). ASHRAE methods employ psychrometric charts and load factors based on specific throughput (andivi.com).
Dehumidifier Capacity Calculator
Manufacturers provide capacity ratings in liters per day (L/d) at standard conditions. Use a capacity calculator that adjusts for site-specific ambient temperature and RH. For example:
Capacity (L/d) = Load (kg/h) × 24 h
Selecting CFM Rating
Airflow (CFM) dictates contact time with coils or desiccant media. Standard practice references 1–2 m³/h per liter of daily capacity. Confirm with psychrometric analysis.
Sizing for Warehouse Space
- Volume-based method:
Required CFM = (Warehouse volume × ACH) / 60
where ACH (air changes per hour) aligns with product sensitivity and occupancy.
- Moisture-balance method:
Prioritize calculated moisture loads over volumetric estimates for large spaces.
Pre-Installation Site Preparation
Site Preparation Steps
- Verify structural integrity for mounting heavy equipment.
- Confirm ambient conditions against unit specifications.
- Ensure clear access for ventilation, service and condensate removal.
Electrical Requirements Guide
- Voltage and phase must match unit nameplate (e.g. 480 V 3-phase).
- Provide dedicated circuits with appropriate overcurrent protection.
- Include space for control wiring and integration with building management systems (BMS).
Ducting and Airflow Setup
- Design inlet and outlet ductwork to minimize pressure drop (max. 0.2 in. w.g.).
- Locate ducts away from obstructions; maintain straight runs longer than 3 × duct diameter before the unit.
Condensate Drainage Options
- Gravity discharge for drainage lines sloping = 1/8 in. per foot.
- Condensate pumps for remote or elevated installations.
- Incorporate trap and vent to prevent air leakage.
Installation Process
Placement Optimization
Portable commercial units often require minimal installation but must be positioned for uniform coverage. Fixed installation dehumidifiers should be centrally located relative to moisture sources.
Mounting Best Practices
- Use vibration isolators to prevent structure-borne noise.
- Anchor units on level platforms rated for at least 1.5× the equipment weight.
- Allow 24 in. clearance on service panels.
Electrical and Control Integration
Wire in accordance with the electrical requirements guide. Commission humidistat controls per manufacturer instructions and calibrate against reference hygrometers.
System Commissioning
- Verify airflow and CFM rating with anemometers.
- Confirm dew-point performance at design conditions.
- Check refrigerant charge and pressures (for refrigerant units).
- Validate desiccant regeneration temperature and airflow.
Operation and Maintenance
Routine Filter Cleaning
Filters should be cleaned or replaced quarterly under moderate conditions; monthly in high-dust environments.
Coil Maintenance Schedule
- Inspect evaporator and condenser coils biannually.
- Clean with low-pressure detergent spray to maintain heat transfer efficiency.
Drain Line Unclogging
Flush condensate lines semiannually. Install clean-outs at strategic intervals.
Refrigerant Leak Checks
Perform leak detection annually. Repair leaks and recharge refrigerant to specified levels.
Calibration of Humidistat
Compare control vs. reference hygrometer readings quarterly; adjust per deviation guidelines (±2 % RH).
Noise Reduction Techniques
- Install acoustic enclosures or baffles around fans.
- Use anti-vibration mounts.
- Select units with integrated sound-dampening features.
Troubleshooting and Safety
Safety Compliance Checklist
- Verify compliance with local electrical and mechanical codes.
- Ensure pressure relief valves and safety switches are installed.
- Confirm unit grounding and bonding.
Common Error Codes
Refer to manufacturer’s service manual. Frequent codes include:
- E1: Humidistat failure
- E2: High-pressure cutout
- E3: Drainage fault
DIY Repair Tips
- Reset control resets for minor faults.
- Clean or replace clogged filters before calling service.
- Tighten electrical connections under power-off conditions.
Professional Service Intervals
Annual preventive maintenance by certified technicians is recommended to preserve long-term ROI.
Energy Efficiency Considerations
Energy-Efficient Models
Units rated by Integrated Energy Resource (IER) and Energy Efficiency Ratio (EER) afford measurable savings. Opt for Energy Star–certified models when available.
SEER vs EER Explained
- SEER (Seasonal Energy Efficiency Ratio) applies to cooling but indicates seasonal performance.
- EER (Energy Efficiency Ratio) is measured at specific test conditions. Higher EER correlates to lower operating cost.
Long-Term ROI
Lifecycle cost analysis should factor capital expenditure, energy consumption, maintenance, and downtime risk. Data from the U.S. Department of Energy indicates that energy-efficient models can reduce annual energy costs by up to 20 % (Wikipedia).


