Pot filler faucet installation has gained prominence among homeowners seeking to enhance kitchen functionality. By situating a dedicated water source adjacent to the stovetop, a pot filler faucet eliminates the need to transport heavy pots filled with water from the sink to the cooktop. The practice of pot filler plumbing involves running a separate water line and securing the fixture—often mounted on the wall—over the stove. Rising demand for “faucet over stove installation” reflects a shift toward efficiency-driven kitchen design, with Google search interest rising by about 50 percent year-over-year for pot filler taps architecturaldigest.com. This article examines the origins, design variations, planning considerations, step-by-step installation process, common challenges, and long-term maintenance associated with pot filler faucet installation.
Early Origins and Evolution
The notion of a dedicated faucet for filling cookware dates back to the early 20th century, when it first appeared in commercial kitchens. According to faucet manufacturer ARCORA Faucets, “The concept of a dedicated faucet for filling pots with water dates back to the early 20th century, where it was primarily found in commercial kitchens” arcorafaucet.com. Commercial chefs valued the convenience of on-location water delivery, reducing downtime during peak service. Over decades, residential architects and plumbing specialists began integrating pot filler plumbing into luxury homes, adapting the commercial design for domestic spaces. By the 1990s, wall-mounted pot fillers with articulated swing-arm spouts emerged, combining functionality with aesthetic refinements suited to evolving kitchen trends.
Design Variations and Key Components
Pot filler faucets fall into two principal categories:
-
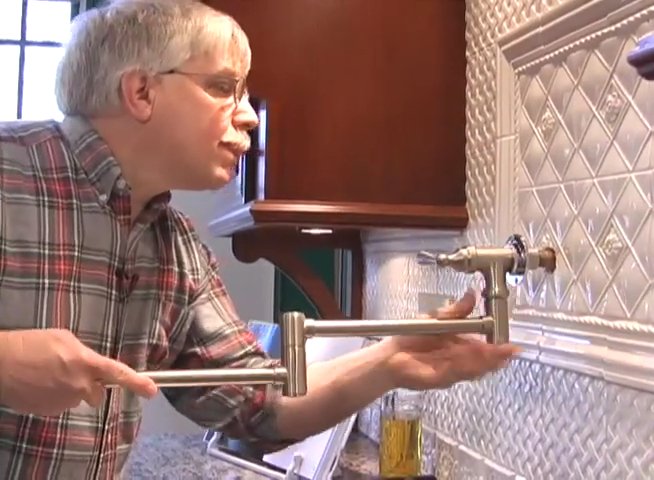
Wall-Mounted Articulating Faucets
Fitted directly into the wall behind the range. These fixtures feature two- or three-joint arms that fold flush when not in use. Articulation points enable reach across multiple burners and retract neatly to preserve sight lines. -
Deck-Mounted Fixed-Reach Faucets
Installed on the countertop or cooktop deck. These models offer a constant spout reach without folding joints. They suit kitchen islands or stoves with integrated counter surfaces.
Both types share common components:
-
Valve Body: Ball or ceramic disc valve rated for hundreds of thousands of cycles.
-
Swing-Arm Spout: Brass or stainless steel extension designed for ease of movement.
-
Mounting Hardware: Reinforced backplate, escutcheon, and mounting screws ensuring stability under weight.
-
Water Supply Lines: Copper or PEX tubing delivering cold (and in some models, hot) water directly to the fixture.
Selection criteria include finish (brushed nickel, chrome, brass), temperature control (single-handle or dual-handle), and flow rate (commonly 1.5 to 2.2 gallons per minute).
Pre-Installation Planning
Site Assessment
First, identify a location above the stove that minimizes obstruction of range hoods or overhead cabinets. Industry guidelines recommend placing the spout outlet between 16 and 24 inches above the cooktop surface thespruce.com. Confirm wall framing behind the backsplash area can support the fixture weight and absorb lateral forces when the spout is extended.
Pot Filler Plumbing Requirements
A new water line must be tapped from the nearest reliable water source. Common options include:
-
Cold-Water Tie-In: Branch off the cold-water line under the sink or adjacent cabinet.
-
Dedicated Shut-Off Valve: Install a quarter-turn shut-off valve within 12 inches of the valve body for maintenance.
-
Hot-Water Extension: Rare, but models exist that supply both cold and hot water, requiring a dual-supply riser.
Charting the route for the supply line may involve drilling through studs, routing through joists, or running within chase walls. The absence of existing plumbing in an external wall may require creating a chase by removing drywall and inserting a backing board for the valve body.
Permitting and Code Compliance
Most municipalities classify pot filler faucet installation as a plumbing alteration subject to permit requirements. Local codes typically demand:
-
Use of code-approved materials (e.g., copper, Type L PEX).
-
Proper securing of supply lines to framing members.
-
Verification of underlying electrical or gas lines to avoid accidental puncture.
Obtain permits before commencing work and plan for a conduit inspection after rough-in plumbing but before drywall repair.
Step-by-Step Installation Process
1. Rough-In Plumbing
-
Shut Off Main Water: Ensure the supply is fully off before cutting into existing lines.
-
Cut and Deburr: Use a tubing cutter on copper or PEX-rated tools to create a clean joint.
-
Install Tee-Fitting: Solder or crimp a tee into the cold-water line at the chosen tie-in point.
-
Run Riser: Route the vertical riser through nearby crawl spaces or stud bays up to the backsplash zone.
-
Mount Shut-Off Valve: Secure within reach of the eventual valve body to allow isolation of the pot filler without shutting off sink or dishwasher.
2. Valve Body and Backing
-
Locate Studs: Mark the positions of studs behind the backsplash.
-
Attach Backing Board: Fit a horizontal 2×6 or furring strip between studs at the correct height. Secure with screws through the stud faces.
-
Rough-In Valve Body: Fasten the valve body to the backing board via the mounting ears, aligning its inlet with the riser.
3. Drywall and Tile Repair
-
Patch Wall: Replace drywall or cement board around the valve.
-
Tile or Backsplash: Reinstall tiles or panels, cutting the opening precisely for the valve trim.
4. Faucet Installation
-
Install Escutcheon: Slip the decorative flange over the valve cartridge.
-
Attach Spout Assembly: Thread or press-fit the swing-arm mechanism onto the valve.
-
Tighten Seals: Use plumber’s tape on threads and torque according to manufacturer specifications.
-
Align Joints: Confirm the spout articulates smoothly and folds flush.
5. Final Connections and Testing
-
Connect Supply Line: Attach the riser to the valve inlet using compression fittings.
-
Open Shut-Off Valve: Slowly restore water pressure while inspecting for leaks.
-
Cycle Valve: Operate the spout through its full range to purge air and verify smooth motion.
-
Check Flow: Place a pot or bucket under the faucet and measure flow rate; typical output is 1.8 gpm or as specified.
How to Install a Pot Filler in an Existing Wall
Retrofitting into an existing wall requires extra care to avoid damage:
-
Access Creation: Cut a drywall access panel behind the stove, matching dimensions of the valve body plus flange.
-
Insulation Clearance: Pull back insulation to clear the riser path without compressing.
-
Rodent Barrier: Seal any gaps around tubing with foam or caulk to maintain the home’s envelope.
-
Backboard Installation: Use alternating studs or install cross-blocking to eliminate the need for wide drywall removal.
-
Finish Touches: After valve mounting, apply low-profile drywall patch and tile over to conceal seams.
This method minimizes opening size, preserves fire-blocking, and speeds up finish work.
Tools and Materials Checklist
-
Tubing cutter or PEX crimper
-
Pipe wrenches and basin wrench
-
2 × 6 backing board or furring strip
-
Copper tee, shut-off valve, riser tubing (Type L copper or PEX)
-
Plumber’s tape, thread sealant
-
Drywall saw, drywall compound, mesh tape
-
Tile saw or scoring tool for backsplash cuts
-
Level, tape measure, stud finder
Ensuring all items are on hand avoids delays once the project begins.
Common Challenges and Solutions
-
Misaligned Studs: If the desired height lacks studs, sister a horizontal backing member between adjacent studs.
-
Rigid Span Limits: Copper risers may kink when forced through small openings; use PEX around corners to simplify routing.
-
Excessive Flow Pressure: Install a flow restrictor or pressure regulator if output exceeds safe pot-filling speeds, risking splash.
-
Tile Matching: Keep spare backsplash material for hidden replacements near the valve to maintain visual consistency.
Anticipating these issues curtails callbacks and ensures a seamless installation.
Safety, Maintenance and Troubleshooting
Periodic inspection prevents leaks and extends fixture life:
-
Quarterly Operation: Swing the arm through its full range to avoid stiffness or corrosion at pivot points.
-
Seal Inspection: Check the escutcheon perimeter for grout or sealant breakdown.
-
Valve Cartridge: Replace ceramic disc cartridges every 5–7 years if minor weeping is detected.
-
Surface Cleaning: Use mild soap and a soft cloth to remove grease-film accumulation, preserving finish integrity.
If leaks appear at joints, tighten compression nuts incrementally; persistent seepage may indicate a worn O-ring requiring replacement.
Cost Analysis and Value Proposition
Average installation costs vary widely. Replacing or installing a standard kitchen faucet runs approximately $162 to $364, with an average of $262 homeadvisor.com. Pot filler faucet installation may range from $280 to over $3,500, depending on wall complexity and permitting thespruce.com. High-end models plus professional labor can push project totals above $2,000 in labor alone, particularly in retrofit scenarios with extensive chase creation reddit.com.
Despite upfront expense, pot filler plumbing adds both convenience and perceived luxury, often yielding positive returns in resale valuations. Real-estate analysts note that kitchens featuring advanced utility fixtures command higher comparables in competitive markets. Owners prioritizing ergonomic kitchen workflows typically consider the investment justified by daily time savings and reduced physical strain.
Expert Perspectives
Licensed plumbing professional Jeff Botelho notes, “Simple kitchen faucet installations take one to two hours, while more complex jobs can take up to eight hours or more” homeadvisor.com. He advises installing a dedicated shut-off valve within direct reach of the fixture to minimize service disruptions when maintenance is needed. Kitchen designer Elena Ramos of Premier Homes Group emphasizes precise measurement: “Placement of the spout is crucial—too low and large stockpots won’t fit; too high and splatter becomes a risk” premierhomes.group.
Long-Term Outlook
As kitchen design trends continue to prioritize specialized function zones and streamlined workflows, pot filler faucets have shifted from luxury novelty to mainstream expectation in mid- to high-end remodels. Data from British retailer Magnet Trade indicate rising consumer interest as media exposure and culinary television programming showcase professional-style kitchens architecturaldigest.com. With robust materials and proven valve technologies, modern pot fillers can remain serviceable for decades when installed and maintained correctly.
Wrapping Up
Pot filler faucet installation represents a fusion of culinary convenience and advanced plumbing design. By following careful planning, adhering to code requirements, and engaging qualified professionals, homeowners can successfully integrate a fixture that enhances kitchen efficiency and adds lasting value. Whether performing a deck-mounted faucet over stove installation or retrofitting into an existing wall, attention to detail—from accurate height placement to secure backing—ensures the pot filler will serve as a durable, functional asset.


